How-To and Shift Info
How-To-HRS (Detailed documentation and troubleshooting)
A shift portal page is available with summarized instructions for shift takers.
This page contains a listing of all procedures, including information that may be relevant only in specific cases. This page is obviously in progress; please contribute to it or contact any of the tritium students with updates.
How to manage your BTA (for Shift Leader)
Open your browser on an a-onl@aonl machine
[1] https://bta/
[2] Login your name/pass word
[3] File->Open Timesheet
[4] choose: Hall:A -> Day-> Shift: Owl(or Day/Swing)
[5] click "Open"
[6] You see the address bar:
(Note that NO time specifically required! e.g.:https://bta/experimenter/a/2014-12-16/owl/end=2014_12_16_08_00;start2014_12_16_00_00) -> this will give you error when you save info for MCC
Instead, do the following
https://bta/experimenter/a/2014-12-16/owl/
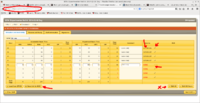
[7] If you want to edit hour(s), Please click very right "pencil" icon, then make a comment or edit time
DO NOT USE *EDIT ALL* ON THE BOTTOM
[8] To save your edited info into DATABASE, just click "V" (check-mark) in same place of "pencil" icon
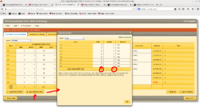
[9] When MCC call you for BTA (An hour before your shift end), click "SAVE INFO for MCC"
[10] Read number ABU and BANU. (That's it ! This should work !)
[11] End of shift, please sign off
[12] Once you've done, please Logout.
| STEP #1 | STEP #2 |
ioc_portserver_reboot_locations
Troubleshooting
- The start and end of run entries do not show up in HALOG:
- Make sure you have waited long enough. Automated entries take a while to show up in the HAlog.
- You want to quit coda, connect to adaql2 as a-onl using ssh, and restart coda. Yes even if you are already connected on adaql2 as a-onl, the ssh part is what you need here.
- If you hear an alarm with a very deep voice, read this [logbook entry.]
Beam Recovery Procedure
Update: October 24, 2010.
- Empty target, establish correct beam position
- 5 uA empty target
- BPM4A (X,Y) = ( 0.0, 0.0) mm
- BPM4B (X,Y) = ( 0.0, 0.0) mm
- See white board for updates on these.
- Tolerances on these : +/- 0.3 mm
- In standard configuration we run without the raster (ok on cryotarget if beam current is less than 5uA)
- Put in BeO target, for visual check of spot (if camera still works)
- 10 uA rastered beam on BeO.
Data Acquisition
Basic Data Acquisition with CODA (updated 11/3)
This assumes runcontrol is already up. If not, go to Starting CODA From Scratch below.
Need to add a description of what/how the data taking process will occur!
- How to run DAQ on LEFT HRS:
- From a terminal login as "adaq" on adaq1 machine (do "ssh adaq@adaq1" without the quotes)
- Password is available on the white board
- After login to adaq1, type "startcoda" to bring up the runcontrol GUI
- The default configuration is " ????", if it is not loaded you can choose it from the menu "configurations->Cool", select "????"
- Click "Platform->connect"
- Click on "Download" button
- Click on "Start (>>)" button, and acknowledge "start-of-run" pop-up window
- To end a run click on "End" button
- How to run DAQ on RIGHT HRS:
- From a terminal login as "adaq" on adaq2 machine (do "ssh adaq@adaq2" without the quotes)
- Password is available on the white board
- After login to adaq2, type "startcoda" to bring up the runcontrol GUI
- The default configuration is "?????", if it is not loaded you can choose it from the menu "configurations->Cool", select "?????"
- Click "Platform->connect"
- Click on "Download" button
- Click on "Start (>>)" button, and acknowledge the "start-of-run" pop-up window
- To end a run click on "End" button
- How to kill coda processes
- At the terminal of adaq1 (for LHRS) or adaq2 (for RHRS), type "kcoda".

