How-To and Shift Info
How-To-HRS (Detailed documentation and troubleshooting)
A shift portal page is available with summarized instructions for shift takers.
This page contains a listing of all procedures, including information that may be relevant only in specific cases. This page is obviously in progress; please contribute to it or contact any of the tritium students with updates.
How to manage your BTA (for Shift Leader)
Open your browser on an a-onl@aonl machine
[1] https://bta/
[2] Login your name/pass word
[3] File->Open Timesheet
[4] choose: Hall:A -> Day-> Shift: Owl(or Day/Swing)
[5] click "Open"
[6] You see the address bar:
(Note that NO time specifically required! e.g.:https://bta/experimenter/a/2014-12-16/owl/end=2014_12_16_08_00;start2014_12_16_00_00) -> this will give you error when you save info for MCC
Instead, do the following
https://bta/experimenter/a/2014-12-16/owl/
[7] If you want to edit hour(s), Please click very right "pencil" icon, then make a comment or edit time
DO NOT USE *EDIT ALL* ON THE BOTTOM
[8] To save your edited info into DATABASE, just click "V" (check-mark) in same place of "pencil" icon
[9] When MCC call you for BTA (An hour before your shift end), click "SAVE INFO for MCC"
[10] Read number ABU and BANU. (That's it ! This should work !)
[11] End of shift, please sign off
[12] Once you've done, please Logout.
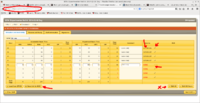
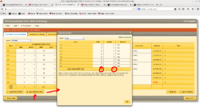
| STEP #1 | STEP #2 |
ioc_portserver_reboot_locations
Troubleshooting
- The start and end of run entries do not show up in HALOG:
- Make sure you have waited long enough. Automated entries take a while to show up in the HAlog.
- You want to quit coda, connect to adaql2 as a-onl using ssh, and restart coda. Yes even if you are already connected on adaql2 as a-onl, the ssh part is what you need here.
- If you hear an alarm with a very deep voice, read this [logbook entry.]
Beam Recovery Procedure
Update: October 24, 2010.
- Empty target, establish correct beam position
- 5 uA empty target
- BPM4A (X,Y) = ( 0.0, 0.0) mm
- BPM4B (X,Y) = ( 0.0, 0.0) mm
- See white board for updates on these.
- Tolerances on these : +/- 0.3 mm
- In standard configuration we run without the raster (ok on cryotarget if beam current is less than 5uA)
- Put in BeO target, for visual check of spot (if camera still works)
- 10 uA rastered beam on BeO.
Data Acquisition
Basic Data Acquisition with CODA (updated 11/3)
This assumes runcontrol is already up. If not, go to Starting CODA From Scratch below.
Need to add a description of what/how the data taking process will occur!
- How to run DAQ on LEFT HRS:
- From a terminal login as "adaq" on adaq1 machine (do "ssh adaq@adaq1" without the quotes)
- Password is available on the white board
- After login to adaq1, type "startcoda" to bring up the runcontrol GUI
- The default configuration is " ????", if it is not loaded you can choose it from the menu "configurations->Cool", select "????"
- Click "Platform->connect"
- Click on "Download" button
- Click on "Start (>>)" button, and acknowledge "start-of-run" pop-up window
- To end a run click on "End" button
- How to run DAQ on RIGHT HRS:
- From a terminal login as "adaq" on adaq2 machine (do "ssh adaq@adaq2" without the quotes)
- Password is available on the white board
- After login to adaq2, type "startcoda" to bring up the runcontrol GUI
- The default configuration is "?????", if it is not loaded you can choose it from the menu "configurations->Cool", select "?????"
- Click "Platform->connect"
- Click on "Download" button
- Click on "Start (>>)" button, and acknowledge the "start-of-run" pop-up window
- To end a run click on "End" button
- How to kill coda processes
- At the terminal of adaq1 (for LHRS) or adaq2 (for RHRS), type "kcoda".
Some common issues with the DAQ
Triggers, Scalers, and Dead Time
Standard configuration
Setting prescale factor for the HRS only (updated 11/03)
   For Left HRS:
 *   log in as adaq on adaq1 machine
 *   type "prescaleL &" to open the GUI
 *   set the desired prescale factors and click "Save" and Exit
   For Right HRS:
 *   log in as "adaq" on "adaq2" machine
 *   type "prescaleR &" to open the GUI
 *   set the desired prescale factors and click "Save" and Exit
   Definition of triggers:(Proposed for Argon- 02/07/17)
       T1 = L-arm s0 && s2 && Shower
       T2 = L-arm (s0 || s2) && (Cherenov||Shower)
       T3 = R-arm s0 && s2
       T4 = R-arm (s0 || s2) && !(Cherenov||Shower)
       T5 = T1 && T3
       T6 = T2 && T4
       T7 = L-arm EDTM trigger
       T8 = 103.7 kHz pulser (for LHRS), 1.024 kHz (for RHRS)
       T9 =
Starting xscaler (HRS) and checking raw trigger rates (updated nov 5, 2014)
Raw rates of trigger and detector channels can be accessed using a GUI. Below are the instructions for opening "xscaler" GUI
- These screens are generally already open on the agen5 machine (above the DAQ machine)
- If it is xscaler is not open then follow these instructions:
- login as a-onl on adaq1 or adaq2 machines (eg: "ssh a-onl@adaq1" )
- passwords are written on the white board
- type "goxscaler" and follow the instructions printed on the screen
- type "./xscaler Left" or "./xscaler Right" to access xscaler display
How to download and check the LHRS MLU trigger (updated 11/05)
Consult the MLU information off the main Hall A wiki page.
[Contact List (to be updated)]

